|
|
Post by morathami on Dec 31, 2015 7:26:37 GMT -5
Hello~ I'm sorry If I post too many problems hehe So it's my first time meshing that isn't frankenmeshing and/or editing existing game mesh. It's a new mesh and I was trying to make a heart hairclip. The mesh fortunately looks good on blender but when I imported to S4S it looked like it was corrupted:( Anyone can help? If you need, you can download my .package + .blend + .DDS here on Mediafire  BLENDER  S4S  |
|
|
|
Post by fuyaya on Dec 31, 2015 9:23:18 GMT -5
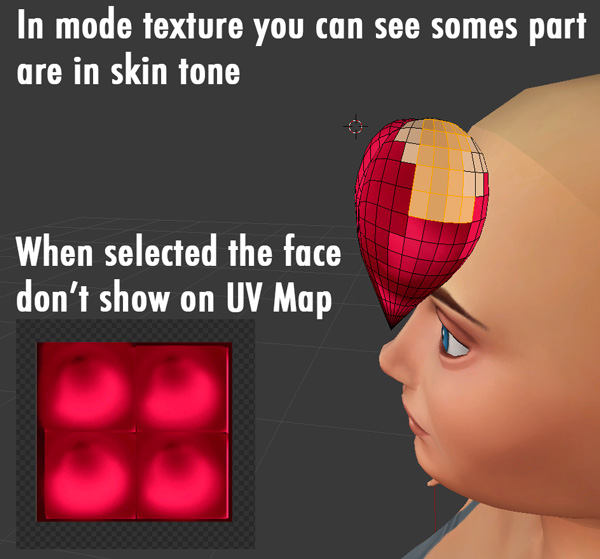
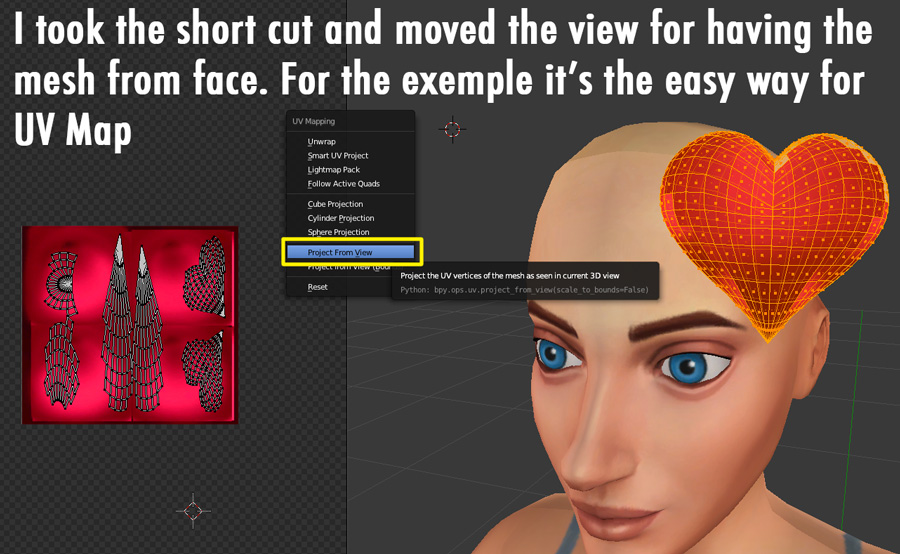
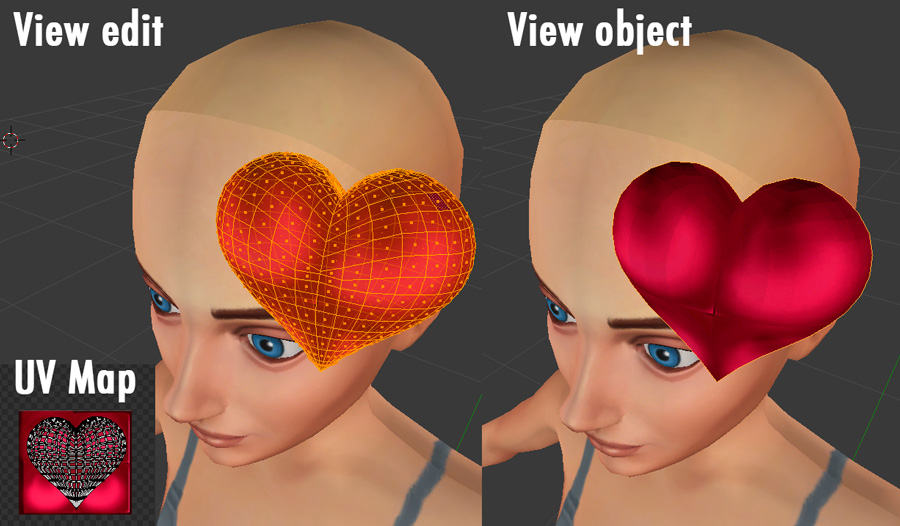
I just took a look to you blend and the part that are not showing are not mapped. I took picture for helping you So first I changed the texture so that I can see your dds on the mesh when I'm in texture in Blender  I confess for small object when I do acessories I use to unwrap from view when the object is small and have a complex form or a perfect symetry.  Now you can see that all your object is unwrapped.  Sorry i'm on my mac so I couldn't test in sims4studio but I thinck it could resolve it. If that not the case first make the correction and we can see what is next  |
|
|
|
Post by Asyli on Dec 31, 2015 11:33:54 GMT -5
|
|
|
|
Post by morathami on Jan 1, 2016 5:03:18 GMT -5
fuyaya AsyliThanks both of you! I'm glad it's fixed now  I have to pay more attention when making UV next time :D I have one more question though, do you know any tutorial that teach about making good texture from scratch so my texture won't be just flat plain anymore:( Thank you :D
|
|
|
|
Post by Asyli on Jan 1, 2016 8:44:59 GMT -5
Happy new year morathami  It was not her fault with UVMap.At all Select everything was displayed in Orange. Select each face separately .I saw it.I do not know why  I share the UVmap individually and save every time. When it's finished I get the UVmap in a 2D Programm.Dann I do the texture only. sorry for my english  |
|
|
|
Post by morathami on Jan 1, 2016 8:54:46 GMT -5
Asyli Happy new year :D Yeah I figured it out  I'm still newbie on this 'meshing' thing so... not to expert hehe <3
|
|
|
|
Post by fuyaya on Jan 1, 2016 10:20:55 GMT -5
Happy new year to you too  I'm doing the same thing, I export the UV Map in Photoshop. I proceed the same than I do for photoshoot and modeling with sims. I create alayer with 128/128/128 it's a neutral gray. After this I use the density +/- in order to create shaddow and give the thing more volume. English isn't my language so I don't know tutorial in english. You should search in you programm tutorial who show how create shaddow |
|
|
|
Post by orangemittens on Jan 1, 2016 16:01:06 GMT -5
Another option for creation shadows is to bake the mesh in Blender and use the resulting shadow map under your diffuse. There is a tutorial HERE that shows how to do this for an object. Currently the process for doing this with a CAS item would be very much the same with the exception of a couple steps. If anyone is interested in giving this a try for CAS I can post some images showing those other steps.  |
|