Get to know the Emission Map
Aug 17, 2015 9:48:20 GMT -5
orangemittens, Dave Rawels, and 19 more like this
Post by untraditionalnerd on Aug 17, 2015 9:48:20 GMT -5
Hello everyone this is not going to be a step by step tutorial but it is more like a "Get to Know post" about Emission map. I want to talk about this because I've seen no CCs involving this powerful map and I think it is time for us to make our CCs glow :3
Do you remember the alien outfit that glows? Well we are going to achieve the same result.
Here I will talk about the Emission map and its basic rules. I want to share with you what I learned.
What is Emission map?
Emission map is what makes a CAS part shine on its own. It's not a reflection. It is a dynamic light that propagates from our mesh. It is not a spot light. You will not be able to make it work as a lamp once in game. We will be working with a DDS so please keep this list in mind.
You will need:
Sim 4 Studio
2D editor that can work with Alpha channel and has DDS Plugin.
The sims 4
Blank Emission Map 1024*1024 1024*2048
I will not explain how to create a mesh and uv-map it. This page is going to be only about the Emission map.
We will answer few questions:
A_How do I add an Emission map to my package?
B_Alpha and RGB channel: What are they used for?
C_Alpha: Permanent light vs Flashing light.
D_RGB channel: How to control light strength and how do I "turn off" some mesh parts?
I've been testing for a while and I want to share with you my findings. Please remember that I'm no expert.
A_How do I add an Emission map to my package?
This is how I add an emission map to a package. There might be other ways but this is mine :3
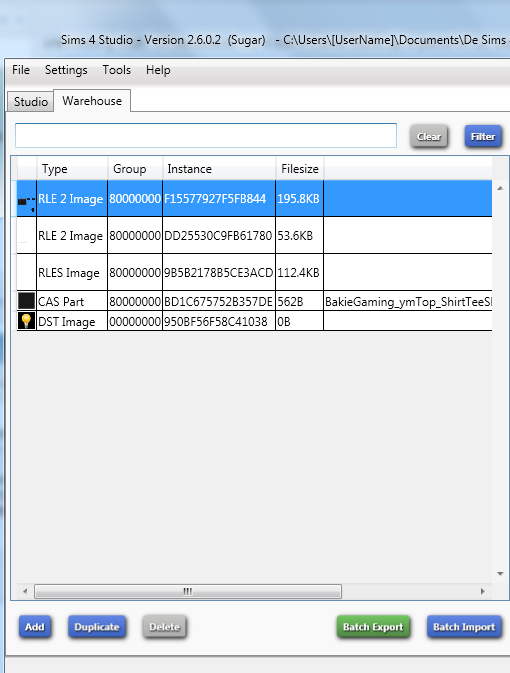
1_ Open your package and go to the warehouse.
2_ Select a Rle 2 file and then click on Add. I select an RLE 2 file so it will have the same group and instance )

3_ A window will appear. Chose DTSImageResource as Type. Change the last digits of the instance to make it unique.

3_b Now click the data tab of the new file and copy somewhere it's info. Group number, Instance and Type.

3_c Import the Blank Emission Map. ( Even if we have a new file listed we don't really have a file in the package yet. This is the reason why I import the blank file.)
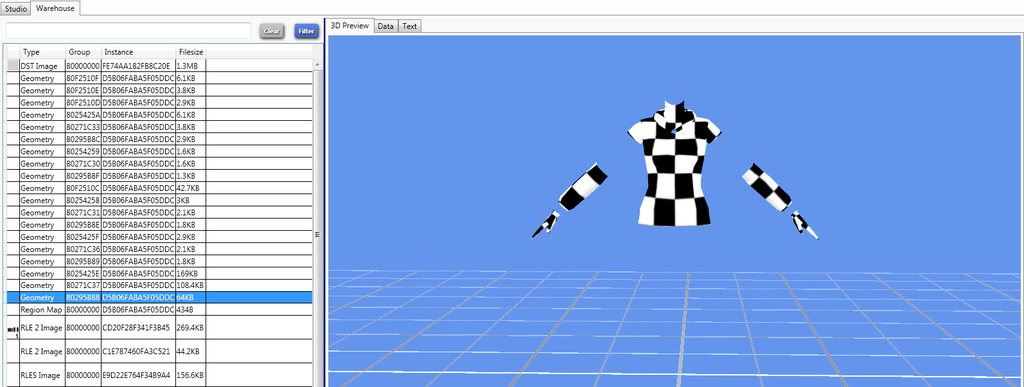
4_ Now we need to link the map to the geometry. Each geometry will need this step. ( I usually avoid linking it for geometries that are part of lod 2 and 3.)
5_ Select the geometry and click on the data tab.
6_ Click Edit Items on the material section.

7_ Click add
8_ Select Emission Map as Field. Typecode : Texture
9_ Paste the info I told you to copy in the proper place.

10_ Save and import your emission map file ( If you have one made by you. )
11_ Save and test :3
Note: I imagine that at this point you might not have any Custom Emission Map. It means that once you test in in game you will not see any difference. It is all good :3
B_Alpha and RGB channel: What are they used for?
The emission map uses DDS files. We need to edit Alpha and RGB channel to make the glow as we want.
The Alpha channel controls the type of light and the speed of the flashing light.
The RGB channels controls the color, the intensity and where the light will appear.
C_Alpha: Permanent light vs Flashing light.
As we said the Alpha layer is what define the type of light.
Remember the values are really import. As you can imagine you can compose the alpha layer to have different type of light with different flashing speed. It's all about your creativity.
Permanent light is defined by Pure black Alpha = 0% Brightness
Flashing light goes by 1% Brightness to 100% Brightness. White is extremely fast and almost pure black is really slow.
C_RGB channel: How to control light strength and how do I "turn off" some mesh parts?
The light color and it's strength is controlled in the RGB channel. It needs to have a black base to work properly. I suggest to work on layers and have a black layer at the bottom and work on transparent layer over it.
It is like the specular map. A low value may be a lot once in game. So don't be surprised if your result is extremely white.
The file that you can use can be a 1024*2048 or 1024*1024 DDS.
If you are working on a project that in the texture doesn't have anything above the head you have to use 1024*1024. ( like a top, a bottom or shoes)
If your project is an accessory you can use the 1024*2048.
If you want a part of the mesh to not have any glow you have to keep it black.
Example:

The alpha has the black outline but it is not needed. I've added it in case I wanted to add a permanent glow to the background but in our case it is white so it would make little difference.
This is the result.

As you can see the emission map is really simple. It is easy to work on it and it gives powerful results. I hope to see many CCs with this map in the future.
I think that a step by step tutorial is not needed because it is all about 2D editing and checking every time how it looks in game but if you want a Tutorial about this let me know.
If you have any problem let me know.
Happy Meshing!
UN
Do you remember the alien outfit that glows? Well we are going to achieve the same result.
Here I will talk about the Emission map and its basic rules. I want to share with you what I learned.
What is Emission map?
Emission map is what makes a CAS part shine on its own. It's not a reflection. It is a dynamic light that propagates from our mesh. It is not a spot light. You will not be able to make it work as a lamp once in game. We will be working with a DDS so please keep this list in mind.
You will need:
Sim 4 Studio
2D editor that can work with Alpha channel and has DDS Plugin.
The sims 4
Blank Emission Map 1024*1024 1024*2048
I will not explain how to create a mesh and uv-map it. This page is going to be only about the Emission map.
We will answer few questions:
A_How do I add an Emission map to my package?
B_Alpha and RGB channel: What are they used for?
C_Alpha: Permanent light vs Flashing light.
D_RGB channel: How to control light strength and how do I "turn off" some mesh parts?
I've been testing for a while and I want to share with you my findings. Please remember that I'm no expert.
A_How do I add an Emission map to my package?
This is how I add an emission map to a package. There might be other ways but this is mine :3
1_ Open your package and go to the warehouse.
2_ Select a Rle 2 file and then click on Add. I select an RLE 2 file so it will have the same group and instance )
3_ A window will appear. Chose DTSImageResource as Type. Change the last digits of the instance to make it unique.
3_b Now click the data tab of the new file and copy somewhere it's info. Group number, Instance and Type.
3_c Import the Blank Emission Map. ( Even if we have a new file listed we don't really have a file in the package yet. This is the reason why I import the blank file.)
4_ Now we need to link the map to the geometry. Each geometry will need this step. ( I usually avoid linking it for geometries that are part of lod 2 and 3.)
5_ Select the geometry and click on the data tab.
6_ Click Edit Items on the material section.
7_ Click add
8_ Select Emission Map as Field. Typecode : Texture
9_ Paste the info I told you to copy in the proper place.
10_ Save and import your emission map file ( If you have one made by you. )
11_ Save and test :3
Note: I imagine that at this point you might not have any Custom Emission Map. It means that once you test in in game you will not see any difference. It is all good :3
B_Alpha and RGB channel: What are they used for?
The emission map uses DDS files. We need to edit Alpha and RGB channel to make the glow as we want.
The Alpha channel controls the type of light and the speed of the flashing light.
The RGB channels controls the color, the intensity and where the light will appear.
C_Alpha: Permanent light vs Flashing light.
As we said the Alpha layer is what define the type of light.
Remember the values are really import. As you can imagine you can compose the alpha layer to have different type of light with different flashing speed. It's all about your creativity.
Permanent light is defined by Pure black Alpha = 0% Brightness
Flashing light goes by 1% Brightness to 100% Brightness. White is extremely fast and almost pure black is really slow.
C_RGB channel: How to control light strength and how do I "turn off" some mesh parts?
The light color and it's strength is controlled in the RGB channel. It needs to have a black base to work properly. I suggest to work on layers and have a black layer at the bottom and work on transparent layer over it.
It is like the specular map. A low value may be a lot once in game. So don't be surprised if your result is extremely white.
The file that you can use can be a 1024*2048 or 1024*1024 DDS.
If you are working on a project that in the texture doesn't have anything above the head you have to use 1024*1024. ( like a top, a bottom or shoes)
If your project is an accessory you can use the 1024*2048.
If you want a part of the mesh to not have any glow you have to keep it black.
Example:
The alpha has the black outline but it is not needed. I've added it in case I wanted to add a permanent glow to the background but in our case it is white so it would make little difference.
This is the result.
As you can see the emission map is really simple. It is easy to work on it and it gives powerful results. I hope to see many CCs with this map in the future.
I think that a step by step tutorial is not needed because it is all about 2D editing and checking every time how it looks in game but if you want a Tutorial about this let me know.
If you have any problem let me know.
Happy Meshing!

UN


