|
|
Post by annewellen on Apr 24, 2020 18:33:56 GMT -5
Hii, somebody knows how to fix this? My hair is literally moving alone Thank you!  |
|
|
|
Post by squari on Apr 24, 2020 21:16:03 GMT -5
Hi, how does your weight paint look? I'd suggest clicking on a vertex in the hairtie to see which bone(s) it is weighted to, then selecting all of the geometry of the bows and weighting them to that bone. If you go into weight paint and can't select vertices, you can click this 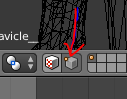 Then you can press N and under Vertex Weights you can see which bones that vertex is assigned to 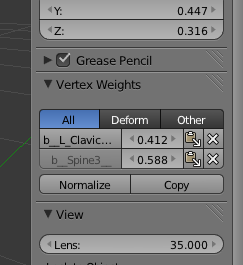 And then after you deselect the hair/hairtie vertex and select the bows, you can go to this menu, find the right bone in the list, set the weight to 1.000, and press assign. If there are other bones there that aren't supposed to be assigned, you can also press the remove button. 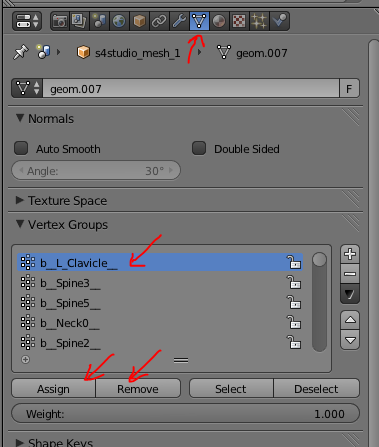 Hopefully that fixes the problem, but it could also be something else. |
|
|
|
Post by annewellen on Apr 25, 2020 21:10:22 GMT -5
Hii, thank you so much for helping me! I tried the whole day to do this and I had some progress, the hair was moving less weird, but I can't fix it at all :( If you don't mind, could you please try to see if this really fixes the problem? This is the blender file: www.mediafire.com/file/5zrcmuvbmn4hu2p/teste.blend/fileI'm really sorry to bother you, I understand if you don't want to do this. Thank you so much again! <3 |
|
|
|
Post by squari on Apr 25, 2020 22:10:12 GMT -5
Hi, I took a look at it. It looks like you have the bows selected already, which is great. You can see on the side in the N>Vertex Weights dropdown that the bow vertices are weighted to the head (when checking this dropdown I'd recommend just looking at one vertex at a time cause it seems to show extra things if you have a whole bunch selected). If you click the head bone in the list shown on the right, the parts of the model assigned to the head will be colored in. You can just press remove to get rid of the weight for the head bone. You can also right click all those extra rigs at the top right of the image to delete them since they aren't necessary and it'll keep the file neat. I usually do that cause I'm not sure but they could end up causing problems. 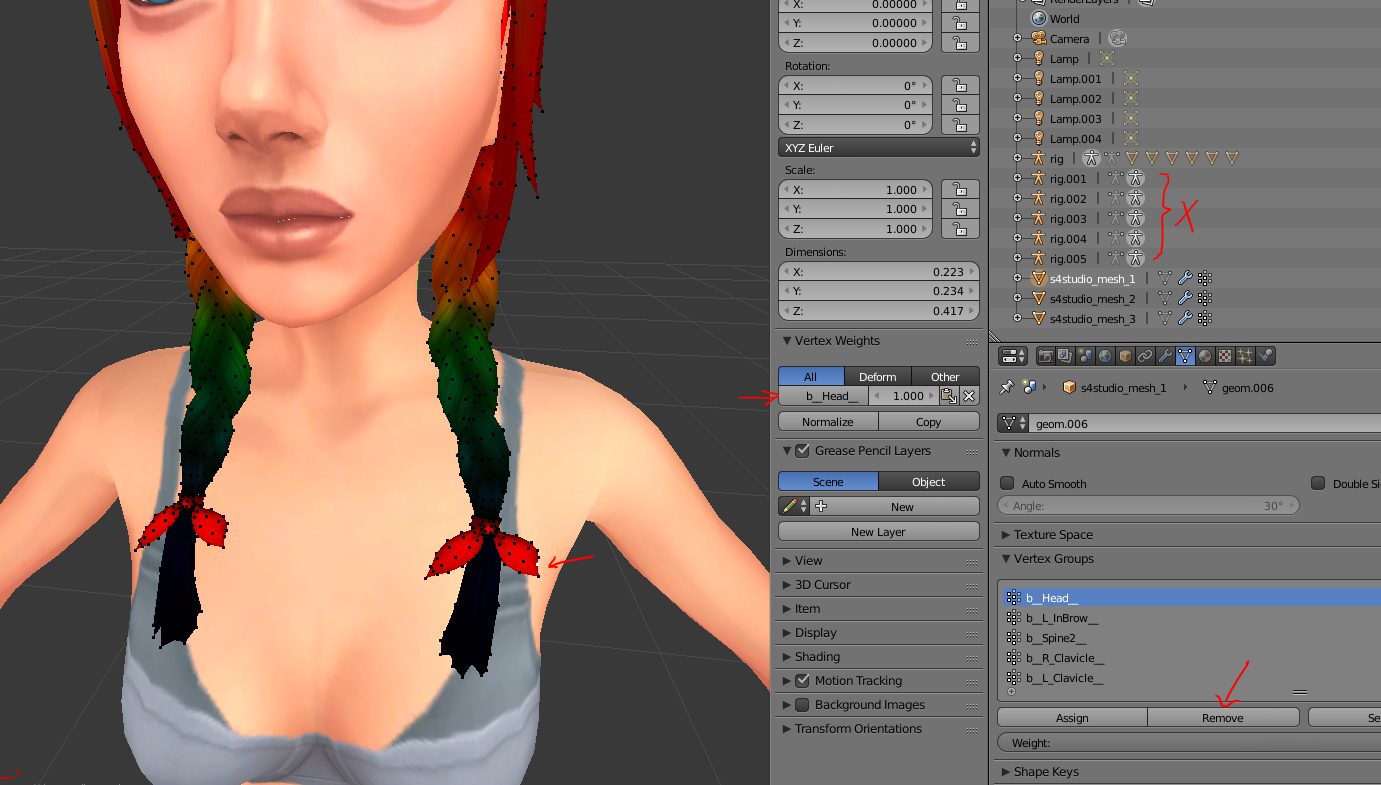 Next, if you select a vertex on the hair as close as possible to the bow, you can see in the N>Vertex Weights dropdown that your vertex is weighted to a couple of different bones in differing amounts (You can press Z to go into wireframe mode and N>View>Clip Start 0.001 if you're having trouble getting a vertex, if you know that already just ignore me). 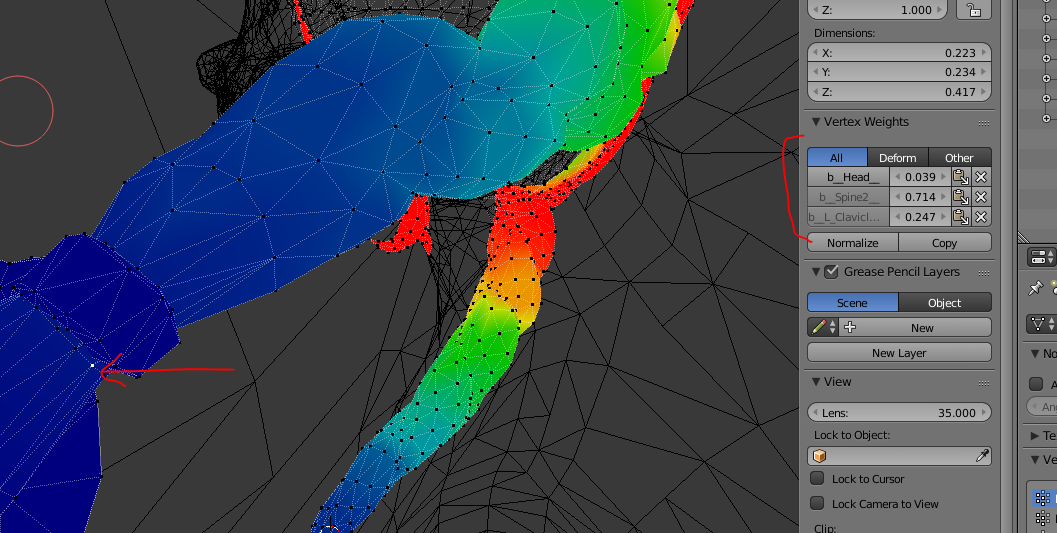 Now you can select the entire bow, select one of the bones, set the weight value to the number you saw on that hair vertex, and assign the weight to the bow and that should fix it once you've done all 3 bones. Let me know how it goes! |
|
|
|
Post by annewellen on Apr 26, 2020 12:41:25 GMT -5
I followed your steps and the hair is acting more normal, like this:  But I still can't fix it :( Does it work in your the sims 4? Thanks for helping! |
|
|
|
Post by squari on Apr 26, 2020 14:44:57 GMT -5
Yes, it works for me. I just did one side and the other side is still acting weird. (ignore the textures and stuff I just put the mesh into a new package lol) 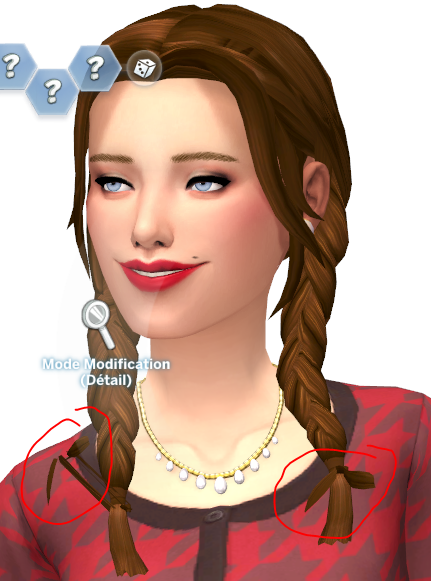 Can you upload your .blend again? |
|
|
|
Post by annewellen on Apr 26, 2020 20:54:28 GMT -5
|
|
|
|
Post by squari on Apr 27, 2020 2:00:36 GMT -5
Hey, I took a look at it. Your vertices are weighted 100% to each of the 3 bones. 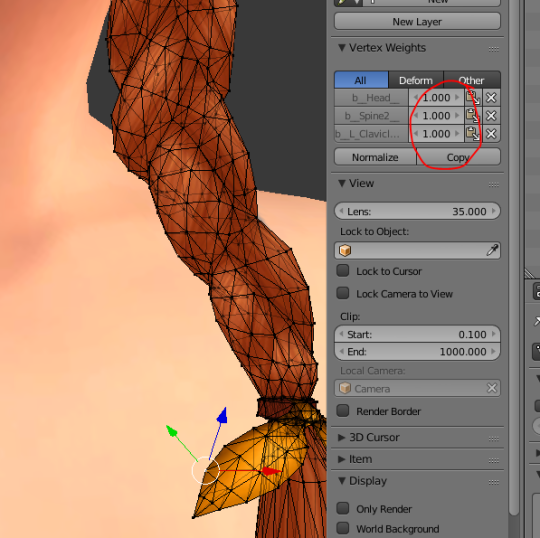 If you look at how they were before, the total weight was split between the 3 bones. You can change the weight value in the bar under Assign/Remove (by default it says Weight: 1.000). Make sure you change the value to match the hair before you assign the weight and it should be fine. (this image) Here is the .blend! |
|
|
|
Post by annewellen on Apr 27, 2020 10:47:26 GMT -5
It worked!!! Thank you sooooo much! :D
I wasn't changing the value to match the hair before assigning the weight, I was changing after assign.
Can't thank you enough, when I release this hair, I'll be putting credits to you LOL
Thanks <3
|
|


